NOTE: The following instructions will only work for ArcServer, ArcPortal, and other enterprise host applications. If you need to access ArcGIS, please see the following article: Access ArcGIS Pro
This article is to walk you through the steps to reauthorize your ArcGIS provisioning file once it has been received.
To License ArcServer/ArcPortal or Enterprise products:
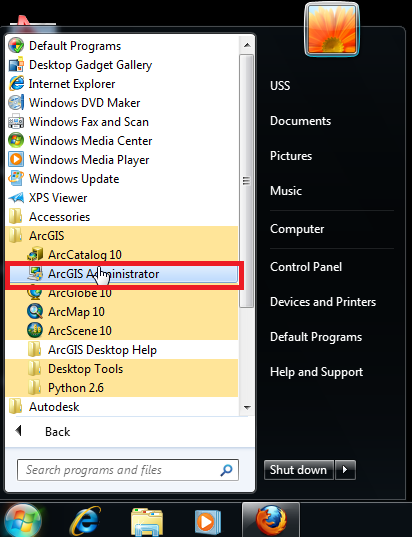
1. Select the ArcGIS folder under the start menu and then in the ArcGIS folder select ArcGIS Administrator.
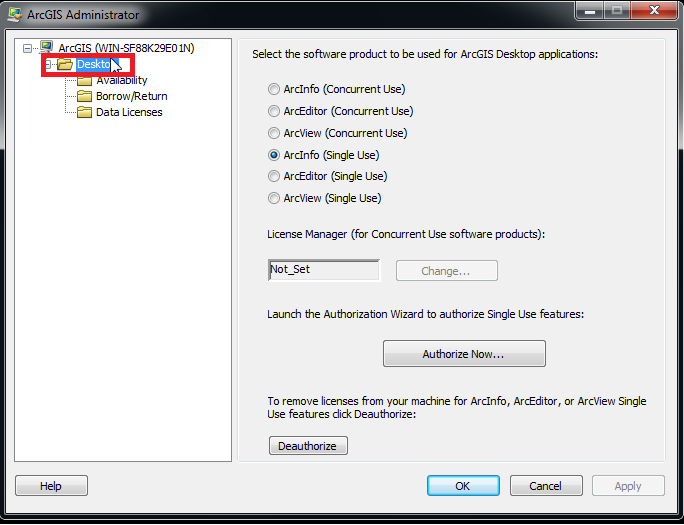
2. In the ArcGIS Administrator window, select Desktop from the sidebar.
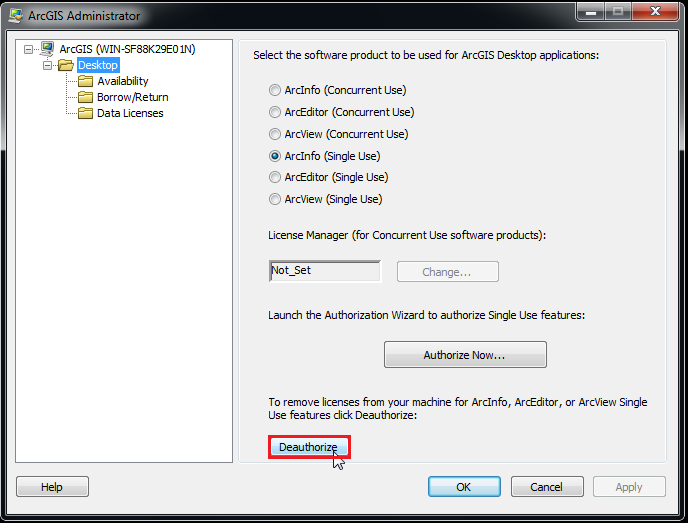
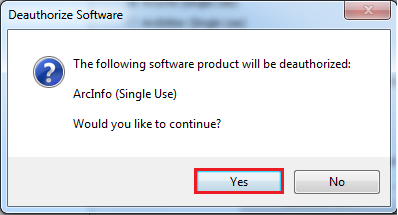
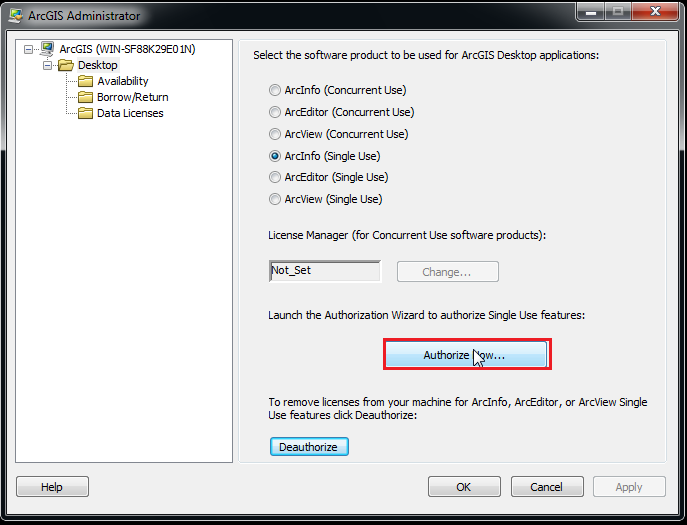
3. In this screen, select the De-authorize button, and when prompted click Yes to de-authorize your current provisioning file.
4. Select “Deauthorize with ESRI now using the Internet” and click Next.
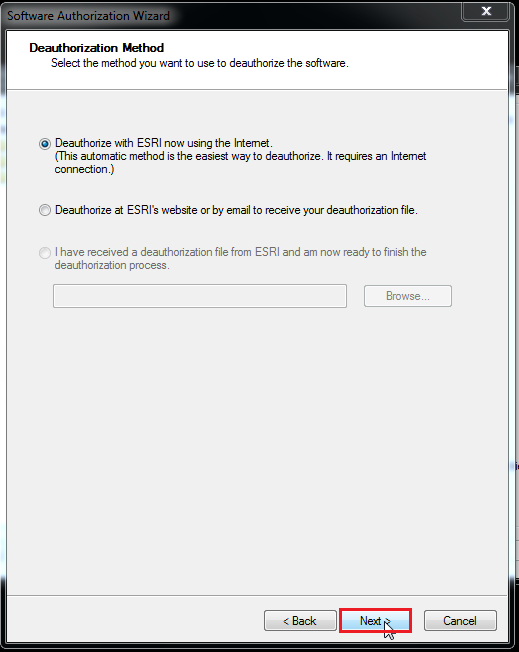
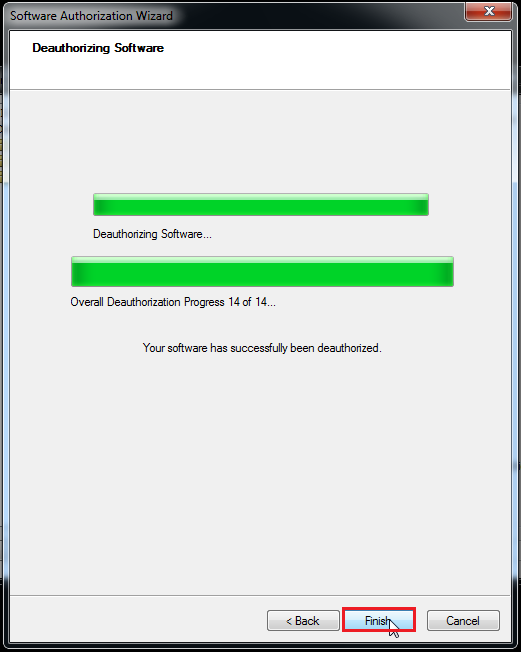
5. Once the software has been de-authorized click Finish.
6. Now, back at the home screen for ArcGIS Administrator select the Authorize Now button.
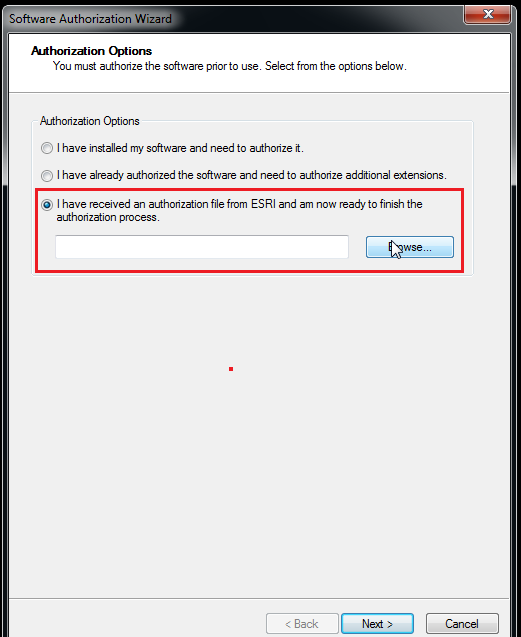
7. For this step select the last option and select browse to get the provisioning file that you have saved to your computer. Once you have selected the file, click Next. You can get the most current provisioning file from TigerWare or through an ArcGIS Troubleshooting request.
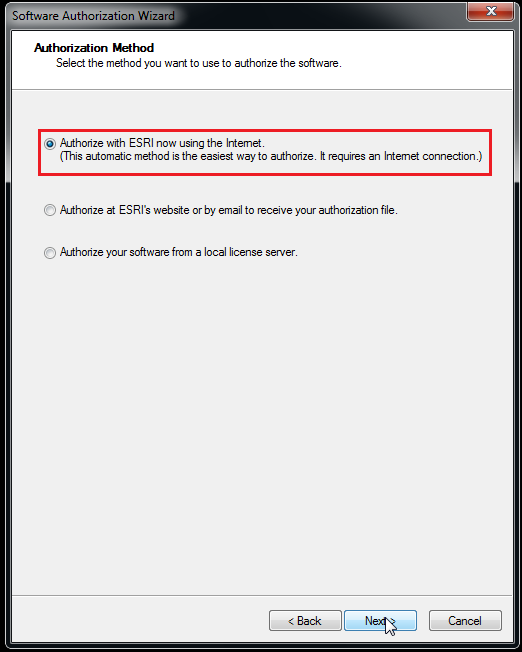
8. Next, you will authorize your ESRI product using the first option.
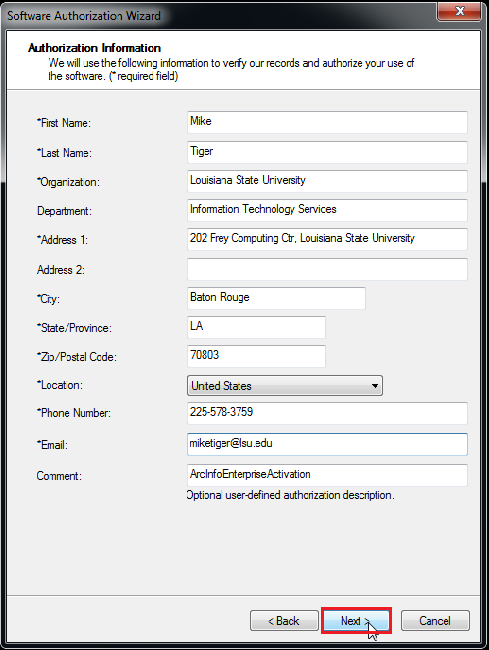
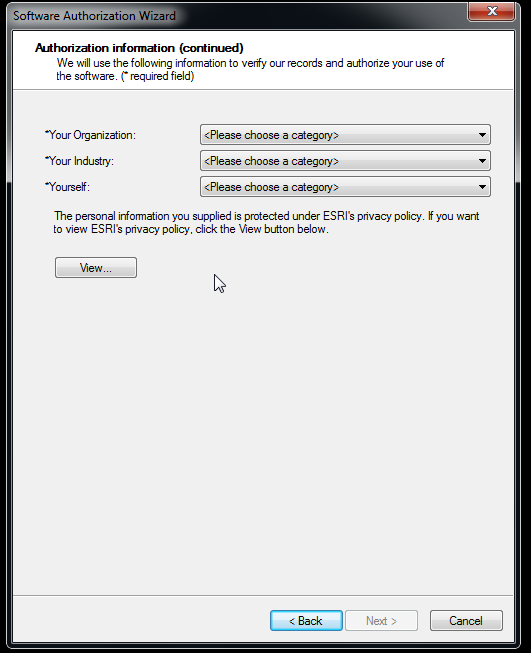
9. For these steps you will need to enter your contact and industry information.
10. In this step, enter the software authorization number. This number is populated by the provisioning file you got from TigerWare or through an ArcGIS Troubleshooting request.
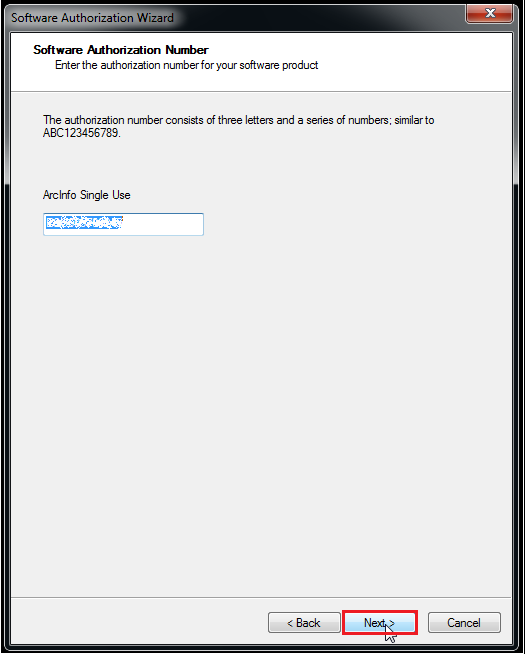
*Question: How do I find this ArcInfo Single Use Number?
*Answer: You can download the new provisioning file from TigerWare or through an ArcGIS Troubleshooting request.
11. The next steps will allow you choose extensions for the product and the option to evaluate some extensions that you do not have authorizations for.
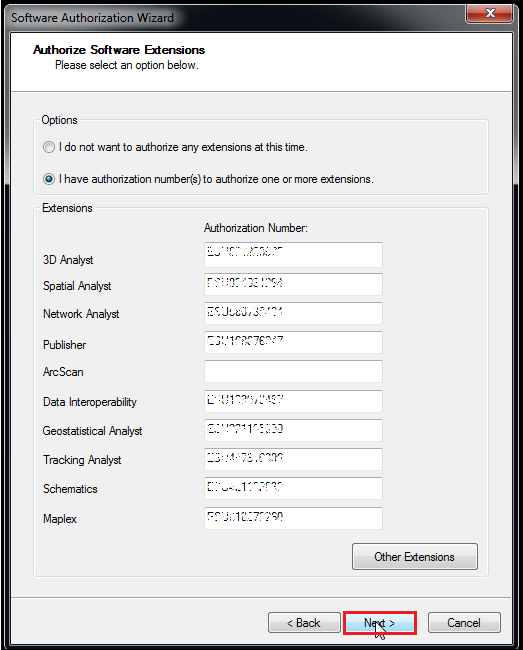
``
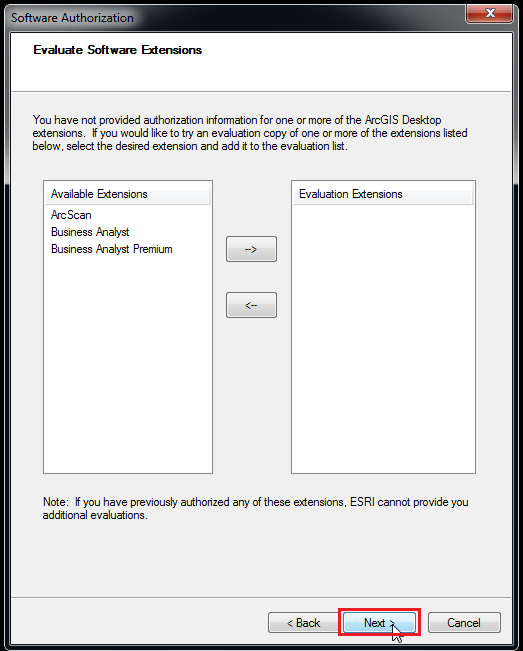
*Question: How do I find these Authorization Numbers?
*Answer: You can download the new provisioning file from TigerWare or through an ArcGIS Troubleshooting request.
12. Lastly, the final authorization progress will start. Once the software is authorized, click Finish.
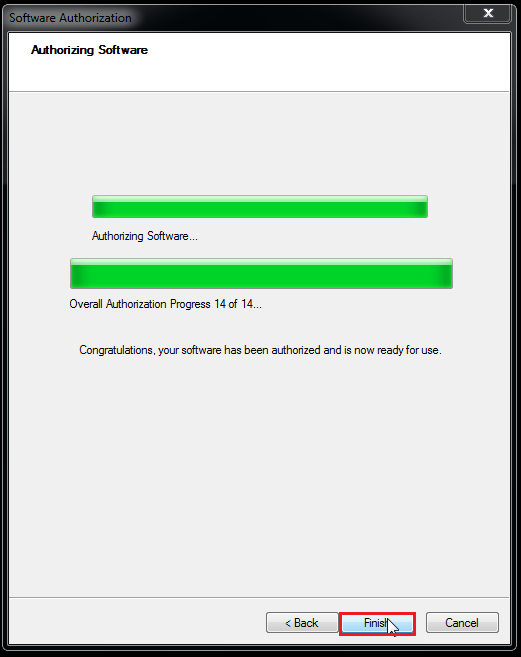
13. If your product did not activate or you experienced any other issues in the steps above please place a service desk ticket with the LSU Service Desk.
Referenced from: ArcGIS.com
[Return to Top]