Mounting an ISO- Windows 8 or higher
This article has not been updated recently and may contain dated material.
Mounting an Image in Windows 8:
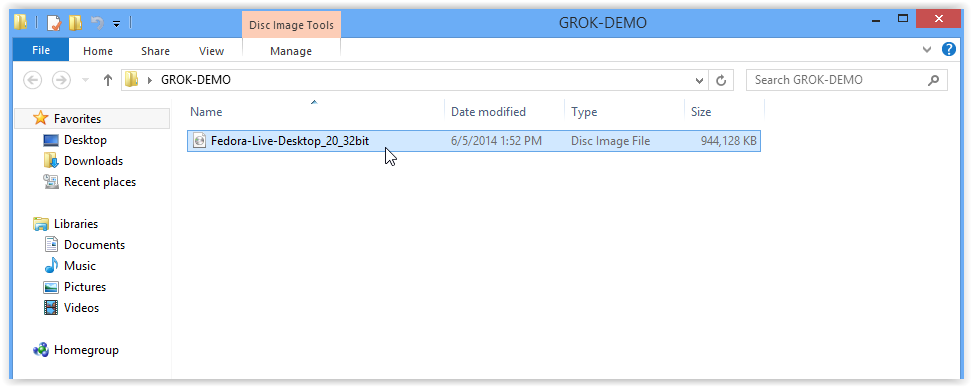
1. Locate your ISO File on your computer.
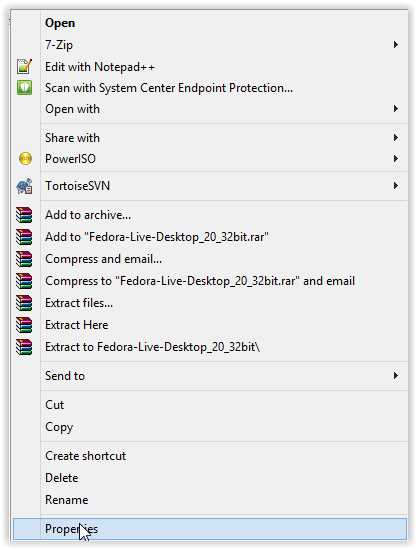
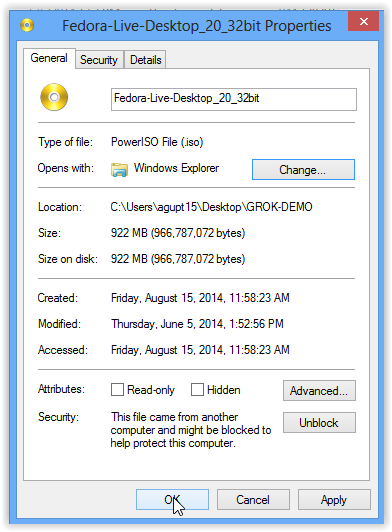
2. Right click the file and select Properties from the context menu, the last option listed.
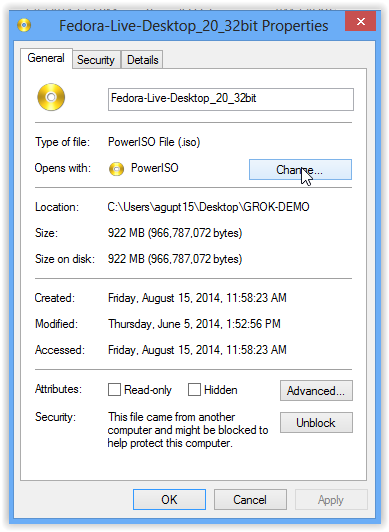
3. Press Change near the top of the window that appears. (To open your ISO with Windows explorer).
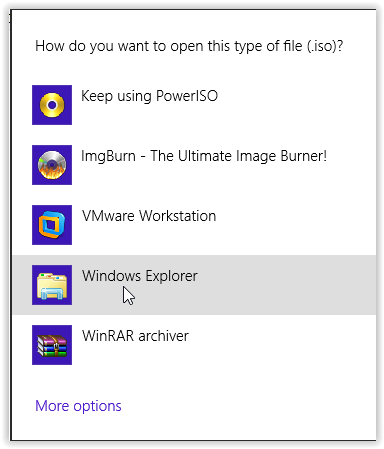
4. Select Windows Explorer on the pop up screen.
5. Press OK at the bottom of the window.
6. Right click on the file again and select Mount, the first option listed.
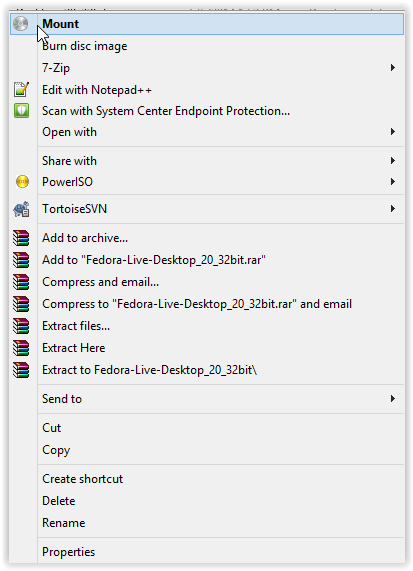
7. The file is now mounted and available on your computer. You can now run the setup application of your program.
NOTE: Your virtual drives are deleted once you restart your computer.
Referenced from: Howtogeek.com
17513
2/5/2025 2:46:32 PM